Taming in ARK Explained: Knockout, Passive and Special Tames
How ARK taming works: torpor and knockout tames, passive feeding, kibble, taming effectiveness, egg-only creatures and imprinting baby dinos.

Taming is the reason most people play ARK. You can survive on the island with a spear and a thatch hut, but the game only really opens up when a raptor follows you into the jungle, a Parasaur carries your berries, or an Argentavis lifts you over a mountain range. Every tame is a tool, a weapon, a vehicle or a farm, and the whole progression of a tribe is built around which creatures it can tame and how well.
ARK’s taming system is also full of details that can waste hours if you misunderstand them. This guide explains the main methods, the systems underneath them, such as torpor, food and taming effectiveness, and the special cases where creatures must be raised from eggs. Examples follow the official ARK wiki. Exact numbers depend heavily on server settings, so this guide focuses on how the systems work rather than precise timers. If you have not tamed anything yet, our ARK: Survival Ascended beginner’s guide walks you through your first tame.
Why Taming Matters
According to the official ARK wiki, tamed creatures can be ridden, carry items, hold inventory, hunt, harvest resources, produce materials and defend your base while you are offline. Items stored in a creature’s inventory also spoil more slowly. In practice, tames shape every stage of the game:
- Early game: gatherers and light mounts that speed up collecting wood, stone, berries and thatch.
- Mid game: flyers for travel, pack animals for heavy materials and combat mounts for dangerous areas.
- Late game: boss-fight creatures, specialists and carefully bred bloodlines.
Knockout Taming: Torpor, Narcotics and Food
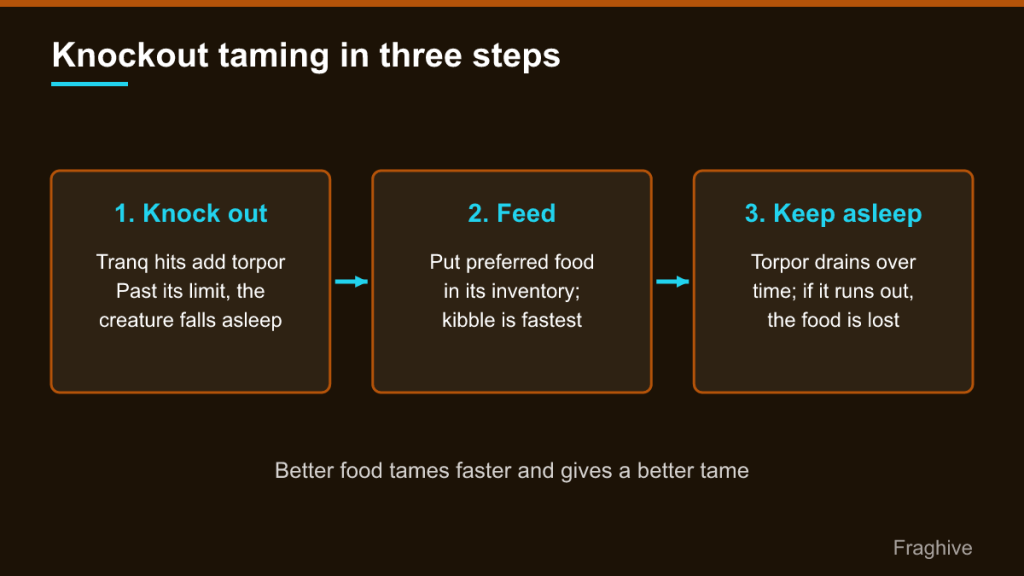
Most creatures, especially aggressive ones, are tamed by knocking them out. The official wiki calls this violent taming, and it follows three steps.
1. Render it unconscious
Every creature has a hidden stat called torpor. When torpor rises above the creature’s limit, it falls unconscious. Tranquilizer weapons such as bows with tranquilizer arrows, crossbows and the Longneck Rifle with tranquilizer darts add torpor with each hit, while certain melee weapons and some creatures’ attacks also knock out targets. Higher-damage weapons add more torpor per shot, but also more damage, so the weapon must fit the creature’s level and health.
Plan the knockout. Shoot from a safe position, such as on a rock the creature cannot climb or behind a doorframe, and make sure it cannot run into water or a crowd of other predators while it fights.
2. Feed it preferred food
Once a creature is unconscious, you place food in its inventory, and it eats over time. The official wiki notes that herbivores eat berries or crops and carnivores eat meat, fish or kibble, and that kibble is typically the fastest option. Each species has preferred foods listed in its taming information; better food tames faster and produces a better tame.
3. Keep it asleep
Torpor drains over time, and if it runs out, the creature wakes up angry and the food in its inventory is lost. You keep torpor high with Narcoberries, Narcotics or Bio Toxin. According to the wiki, Narcoberries add the least torpor and Bio Toxin adds the most. Large creatures often need significant stacks of Narcotics, so prepare before you shoot.
Special knockout cases
Not every creature responds to tranquilizers. The wiki lists several, including the Titanosaur, Rock Elemental, Karkinos and Astrocetus, that ignore tranquilizers and must instead be knocked out with damage to the head from specific weapons; the Cannon is listed as the most efficient. In ARK: Survival Ascended, some newer creatures, such as the Fasolasuchus and Yi Ling, need special steps before they can be knocked out at all.
Passive Taming: Hand-Feeding Peaceful Creatures
Many creatures are tamed non-violently, often called passive taming. Instead of knocking them out, you feed them by hand while they are awake. The process described on the official wiki:
- Put the creature’s preferred food in the last slot of your hotbar.
- Approach the creature and feed it when the prompt appears.
- Wait until it becomes hungry again, then feed it again. Repeat until the taming bar fills.
The first feeding binds the creature to you. If you wait too long between feedings or move too far away, progress resets. Some creatures also need protective equipment: the wiki mentions Bug Repellant for the Araneo and Ghillie Armor for some other species, and certain creatures turn aggressive when touched. Many species have their own unique methods, which is why reading a creature’s taming entry before you start is so important.
Passive taming can be slow, but it has a big advantage: the creature is not damaged and does not need narcotics. The main dangers are wandering predators and other players while you stand next to it.
Taming Effectiveness and Bonus Levels
Every tame has a taming effectiveness (TE) value. It starts at 100% and drops each time the creature eats from its inventory during taming and each time it takes damage while unconscious. Better food reduces it less, which is the main reason preferred food and kibble matter.
TE determines how many bonus levels the creature gets when the tame finishes. The official wiki gives the calculation as the wild level multiplied by TE, divided by two, rounded down. On official settings, wild creatures spawn up to level 150, so a level 150 creature tamed at nearly perfect effectiveness gains 74 bonus levels and reaches level 224. Each bonus level adds a random stat point. After taming, you can level the creature yourself up to 88 more times.
Ways to protect your TE:
- Use the creature’s preferred food or kibble rather than generic meat or berries.
- Avoid hitting an unconscious creature with anything but torpor-only methods.
- Protect the tame from wild predators that attack it while it sleeps, for example with walls or a defensive tame nearby.
- Do not overload its inventory with low-value food it will eat first.
Lower-level creatures tame faster, which makes them good choices when you are learning. Experienced players hunt high-level creatures because their stats matter for breeding.
Kibble Explained
Kibble is a prepared taming food cooked in a Cooking Pot or an Industrial Cooker. Recipes combine an egg of a certain size with other ingredients such as berries, vegetables, meat or fish and, in a Cooking Pot, water from a Waterskin or similar container.
According to the official ARK wiki, kibble is organized into six quality tiers: Basic, Simple, Regular, Superior, Exceptional and Extraordinary. A higher tier generally works on creatures that accept a lower one, but each species has a preferred tier that tames it most efficiently. The wiki’s examples include Basic kibble for creatures like the Dodo and Parasaur, Simple for the Raptor, and Extraordinary for top-tier creatures such as the Rex.
A few practical notes:
- Kibble spoils, so cook it close to when you need it or store it in a refrigerator.
- Fertilized eggs from your own breeding can be used for kibble, which makes egg collection easier later.
- Kibble is also used for imprinting babies, so keeping several types around is useful.
- Kibble recipes and tier assignments have been reworked over the series’ history and can differ between ARK versions, so check the current list for the version you play.
Special Tames: Eggs, Traps and Unique Methods
Some of ARK’s most valuable creatures cannot be tamed by knockout or hand-feeding at all.
Raise-only creatures and egg stealing
The official wiki lists creatures such as the Deinonychus, Wyverns, Rock Drakes and Magmasaurs as raise-only: you must obtain an egg or a baby and raise it. Wyverns are the classic example. Adult Wyverns cannot be tamed, so players steal fertilized eggs from wild nests guarded by adults. Taking an egg usually brings the flock after you, so tribes use fast flyers for solo raids or have one player distract while another grabs eggs.
The egg then needs to be kept within a specific temperature range to hatch; the wiki recommends an Egg Incubator for stable results. Baby Wyverns drink only Wyvern Milk until adulthood, which must be taken from wild Wyverns.
Trapping and capture methods
Other tames involve holding a creature in place or capturing it. Players commonly use bolas, traps and enclosures to stop fast creatures from fleeing during a knockout. Smaller aquatic creatures can be captured with a Fish Basket; the wiki warns that if the basket’s durability spoils to zero, the creature dies.
Temporary, crafted and reward creatures
Some creatures can only be controlled temporarily, while others, like the Enforcer, Scout and Mek, are crafted from blueprints rather than tamed. A few, such as the Mega Mek or Fenrir, come only from specific bosses, missions or events.
Imprinting: Raising Better Babies
Breeding and raising creatures introduces imprinting, a bond that improves a baby’s stats while it matures. According to the official wiki:
- By default, only the player who claimed the newborn can imprint it.
- At regular intervals, the baby requests care: a specific food item (often kibble), a cuddle, or a walk.
- Each completed request raises imprint percentage. Missing one has no penalty beyond losing that bit of bonus.
- At full imprint, most stats rise by about 20%, except stamina, oxygen and crafting skill.
- The imprinter also gets up to 30% extra damage and resistance while riding the creature.
Imprinting is permanent and stays with the creature even if traded, though bonuses are not inherited by offspring. In ARK: Survival Ascended, an old trick of putting a baby in a Cryopod to reroll its request was patched.
Common Taming Mistakes
Starting without enough narcotics
A large creature waking up halfway through a tame wastes everything. Prepare more than you expect.
Leaving the tame unprotected
An unconscious creature is easy prey for wild predators, and every hit lowers TE.
Using the wrong food
Check the preferred food and kibble before you start; generic food can mean a much slower tame and fewer bonus levels.
Ignoring server settings
Taming speed, maturation and imprint timers are often changed on unofficial servers and single-player games. If timings seem very different from guides, check the server rules.
To see how ARK’s creature-centric progression compares with Minecraft, Rust and Valheim, see our survival game comparison.